Friday, June 12, 2009

Layers of Cotton and Shellac


Decided to wrap the Schwinn with Brown cloth tape. This way it would match the saddle and the bar end shifter cable could be hidden underneath it.

Single Coat of amber Shellac


2nd coat of amber shellac


3rd coat of amber shellac


4th and final coat of amber shellac

Wednesday, May 27, 2009

Schwinn photos


So this is where it currently stands. Yes, the seat clamp needs to be switched around.

Schwinn update

At school currently, so no photos of its current state, but, Rachel's Schwinn is almost done. Since the last posting, I applied the decals, clearcoated the frame and fork and have begun to hang the parts on her. Even though the old crank was a triple, the new crank slightly rubs on the chainstay, so I'll need a new BB axle. The current one was 119mm and I bought a 126 off of eBay for $12 shipped.

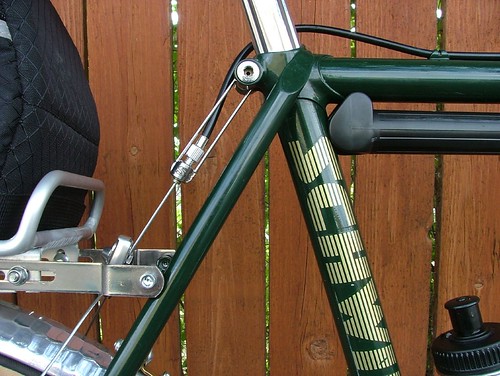
So, waiting on a longer BB axle and some pink brake cable. I've also decided to wrap the handlebars using brown cloth tape with amber shellac. Going to get the tape from VO.

Also am planning on buying this rack and doing what "stepinthefunk" did (see below). He cut off the outer ring on the rack so its more sleak and minimalist.


Friday, May 15, 2009

Schwinn Cranks

Photobucket

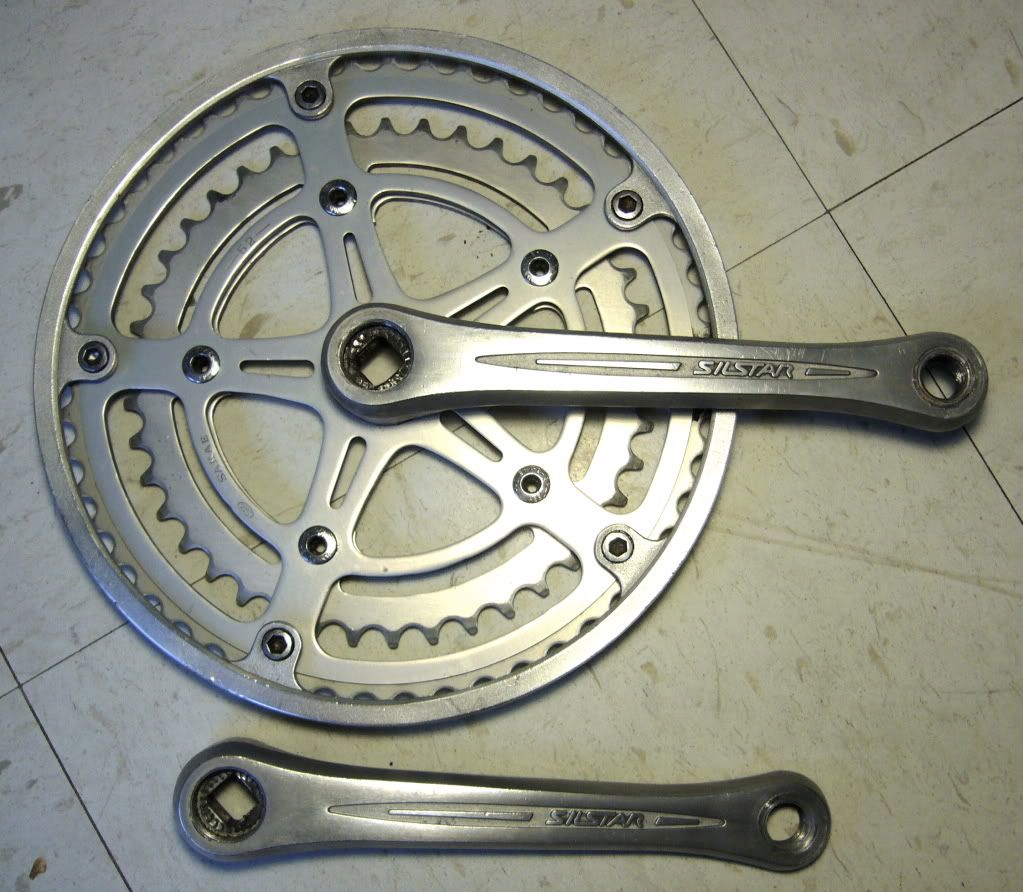
So, I've had these Sugino "Silstar" cranks and wanted to use them on Rachel's Schwinn. However, the large ring is fixed and is 52 tooth. Rachel doesnt need a 52. Additionally, I wanted to only give her one ring up front to ease shifting.

So, I grinded off the teeth on the big ring of the crankset. Now, there will be a guard on the outside and the 40 tooth inner ring will actually be about the perfect size for a single ring up front.

Thursday, May 7, 2009

Schwinn Fork Painted


So, I sanded down the fork on the Schwinn CrossFit. I thought that the steering tube was covered in grime, it was actually rust. Schwinn didnt paint it, just bare metal. Cheap bike I suppose.

So I sanded down the steerer to bare metal, then primered the thing. On the base of the steerer it said "Spinner" looked like a brand name. Also it had stamped 1991 on it, which I had figured.


This morning, I hit it with the first coat of Jade. I will go back over it later today because I missed some nooks and crannies.

Progress is fun.

The Old Bike Blog

I'm a fan of this guy. Check out the before and after of a bike he restored:


Wednesday, May 6, 2009

Schwinn Decals


So this is on order......reproduction pink Schwinn for Rachel's bike.

Pair for $10 from Graphicity.com

Tuesday, May 5, 2009

Fenders

So I'm on the fence about fenders.

My options:

1. Buy VO 48mm fluted fenders now for $42


2. Wait a month or more and buy Honjo's for $85.


I like the look of the Honjo's better. Additionally, for my 32mm tires, I like the width of the Honjo's more. But for twice the price? Eh, that's tough to swallow.

Univega Mounted on the wall


This is partially to display the current state of the Univega and partially to show my new bike mount.

What's new with the bike since the last post?
-new wheels (Shimano 105 and Mavic MA2)
-Panaracer Pasela tires 700 x 32mm
-front derailleur
-leather saddle
-new seatpost
-rack partially mounted
-barcons in place

The bike mount is a Home Depot hack. Each bracket was about $3. So $6 later plus 4 wall stud molly type bolts and instant bike rack.

Schwinn painted


So the weather has been nice and this means that I've been painting. The Schwinn frame took 2 cans of white primer and one can of "Jade" Krylon. The jade comes in satin only, but I will be putting a clear coat over this after application of some cool Schwinn decals which the misses wants in pink.


I'm thinking I will also highlight the letters on the headbadge before I clearcoat it.

Friday, April 17, 2009

Removed the logo


I had this ITM stem and it was the perfect size for the Univega Specialissima so I installed it. But that freaking ITM logo was annoying me. Largely because I wanted most everything on this bike to be Japanese. But, I didnt want to buy another stem just because of this.

So, I pulled out the wife's finger nail polish remover and scrubbed off the logo; much better.


Yes, the stem still isnt Japanese, but at least it isnt so obvious now.

Monday, April 6, 2009

Wheels


Well, I threw on a pair of 27" wheels I had. The black rims arent ideal, but I'm going to use them until I find some silver wheels for a good price, or a donor bike.

All thats really needed now is to get my bar end shifters in the mail and my Brooks saddle. Prices for Brooks have been crazy on eBay selling for more than new. So, I may just buy a new one.

Also, I went to Home Depot and bought some stainless steel nuts for my brake pads. I like the narrower look a lot more than the standard allen buts that come stock.

Before:


After:

Saturday, April 4, 2009

Rear Brake Hanger


I've been eyeing this Surly rear brake hanger for over a year now. It looks so cool. I was looking at putting it on the Univega but a) I have a silver (steel) brake hanger in my parts box and b) I'm already over budget on the build and this little guy sells for $10 and c) I think it looks a little too modern.

Current State of Affairs


So, this is where the Univega currently is in the process. Bikes look so sad without wheels, hopefully, I'll be getting some soon.

I still need to buy a leather saddle (i.e. Brooks). I'm also going to buy a new longer seatpost. I dont think that LaPrade is going to be long enough.


the levers are old and the hoods are new Cane Creeks


the polished crank arms look pretty good on here as well as the Wellgo R4 pedals. The cage might not stay, but I have it for now.

Cleaning up pedals

So, I wanted this Univega bike to be kind of retro 1980's/classic looking. All silver, non-aero brake levers centerpulls etc.

So when it came to pedals, I had to think carefully. Platform pedals would have been cool.


But, I'm planning on riding this bike for longer than 2 miles, and I dont like wearing platforms for much longer than this. Even with the addition of toe clips, I dont like it.

I have used Look pedals for years as well as Speedplays, but I felt like both of these wouldnt have preserved the look I was going for. Even though Looks were made in the 80's I guess I wanted this bike to have a more classic look. Plus, Looks are so bulky and un-elegant.

What I chose was a pair of SPD-R pedals, Wellgo R4's actually. They are silver, clipless, and minimal. Although they were made in the 90's, I actually think they will fit this bike well.

I bought a pair off of eBay for $10 shipped with cleats, score! They were scratched up as to be expected.

By using just 000 steel wool I was able to remove the anodized coating and with a coat of Brasso on top of that, they really shine. Check out the before and after:


I would have used the Oven Cleaner trick, but there are so many small nooks and crannies, I was afraid it would take much longer (and it would have). Additionally, I was concerned about removing the spring loaded plate and never being able to put them back together.

The 000 steel wool worked well and was a good lesson, you dont always need oven cleaner to remove anodized coating

Sunday, March 29, 2009

Polishing Aluminum


So, Ray Dobbins did a good write-up about how to polish aluminum parts on his site. I started with his directions and have done quite a few parts now. Below is what I've learned.

He writes that the oven cleaner can pit the aluminum after 3-5 minutes. I have not had this experience. Typically what I do is spray down the part, let it sit for 3-5 minutes and then take some 000 steel wool to it. Then I look at what areas are still anodized and spray it again. Typically, I do this about 4-5 times. To get it all off. Thus far I have not had any pitting on any of the parts I've done.

I have found removing clear/silver anodizing the toughest to remove. Maybe because its more difficult to see what areas are still anodized or maybe its the chemical composition of that color versus black (which seems easier).

You know your done when the part is fairly dull, almost gray. You'll think at this stage that you made a mistake and wasted your time.

Next, if the part has a lot of scratches, gouges, dings, nicks etc, pull out some fine sandpaper and sand out these imperfections. The steel wool (in the next step) will get out any fine scratches from the sandpaper. The level of perfection you want in your final results is largely dependent on how much time you spend in this stage. If you want the part perfect, make sure all gouges are out in this step.

The next step I do is polish with #000 steel wool and Brasso. After I feel comfortable with the results of this step. I pull out the Simichrome and a soft cloth and rub the part down further. The part should sparkle like new.

You could use a buffing wheel as Ray Dobbins advises, but I dont have one. And although this process takes a some time and a strong arm, the results comes out pretty good.

Above photo is the cranks I did today, drive side is an example of what the non drive side used to look like.

Saturday, March 28, 2009

Univega Specialissima


This is going to be my new ride. A 1981 Univega Specialissima. I bought her off of eBay for $78 plus some shipping.


I'll use a lot of parts from my closet to dress her up. All silver stuff. I'm planning bar end shifters from Suntour and a leather saddle. One of my inspirations for this bike is this:


A guy's bike from the C & V section of bikeforum.net

Monday, March 16, 2009

Peugeot PX-10


Then, the same day I sold the Bianchi, I bought a Peugeot PX-10. Paid $150 for it. The bike is in moderate condition (although it did have mountain bike bars on it).

The seller said it had "cheesy" rear derailleur (uh, that's the original Simplex RD). My main concern when I went to look at it was the chrome. I didnt know what parts were on the bike, but at least I'd be buying it for the frame and fork. The chrome is in good condition. Additionally, most of the components are original.The paint is in okay condition, a lot of chips.

Now comes the fun part.


Original Brooks Professional saddle dead?


French Stronglight cranks with french threaded Lyotard pedals

Sold the Bianchi

After the maiden ride, my fears were confirmed. The bike was too small. Now for anyone reading this wont be surprising: I'm 6'1" and the bike was a 55cm.

Guess you could say it was my first flip. I paid $149, put $28 into it totaling $177. Then I sold for $280. Profit = $103.

Monday, March 9, 2009

Schwinn Cross-Fit Catalog


Old bike catalogs are cool.

Schwinn Cross-Fit stripped


One of the parameters of the project was that it couldnt cost a lot. I set a budget of around $200. I began acquiring parts, some new from Velo Orange and some old from eBay and my parts box.

When I had all of the parts, I stripped the bike down and took a propane torch to the decals to burn them off. This works very well, produces little smoke, and is easy. I've had great success with this method in the past.

Next I took a putty knife and scraped off all the burnt decals. Some coarse sandpaper was next, sanding down the little pits and chips here and there.


I will take a lighter sandpaper to it next to make it nice and smooth. Not too much of a rush though. My only work area is on the roof of my apartment building it its supposed to be cold and wet for the next week or so.

Schwinn Cross-Fit


My wife has had this 1991 Schwinn Cross-Fit for a couple of years. We bought it from a Thrift Store for $25. About a month ago, I decided I would remake this hybrid into something pretty cool. Something like this from ANT bike.

Saturday, March 7, 2009

Avocet Computer


The Bianchi came with a Cateye CC6000 as mentioned. But I just found this Avocet Altimeter 50. Supposedly, it has an altimeter built in (I wouldn't count on it working well). But look at the colors, like perfect right?

Thursday, March 5, 2009

Touchup Paint


After cleaning the Bianchi up, all of the little nicks and scratches began to make themselves apparent. I did a little internet hunting and read some people say Dupli-Color automotive touchup paint is much more durable than Testor model paint (which makes sense).

I went to my local Autozone and for $6.49 bought the Universal Black. This thing is pretty cool because on one end it is like a ball point pen and then other end is a little brush. This made the job really easy. All the scratches and nicks went away (black is a great color for this).

The bike looked good before, but now it looks even better.